
Deployment with aaPanel
Installing aaPanel
This Docker-based tutorial for installing AnQiCMS is demonstrated using aaPanel (BT International Version).If aaPanel is not installed on your server, follow the steps below to install it. If it's already installed, you can skip this section.
Download link for aaPanel: https://www.aapanel.com/new/download.html
Visit the download page, copy the appropriate installation command based on your requirements, log in to your server, paste the command, and execute the installation.
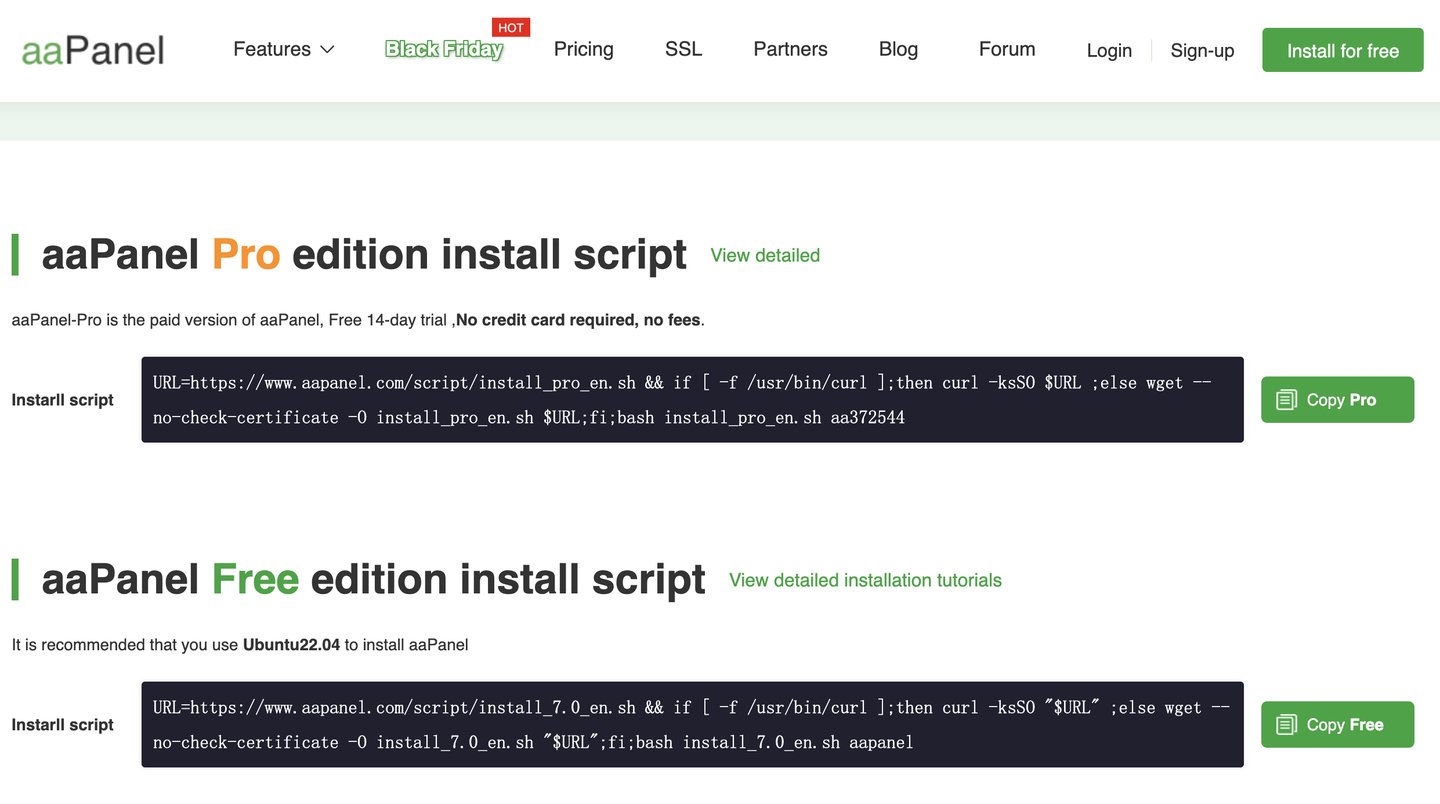
Besides command-line installation, you can also choose online installation via aaPanel. If you encounter any issues during the installation process, you can find customer support information on the download page to request assistance.
Installing AnQiCMS
If you have any questions about using Docker with aaPanel, visit the aaPanel forum for help.
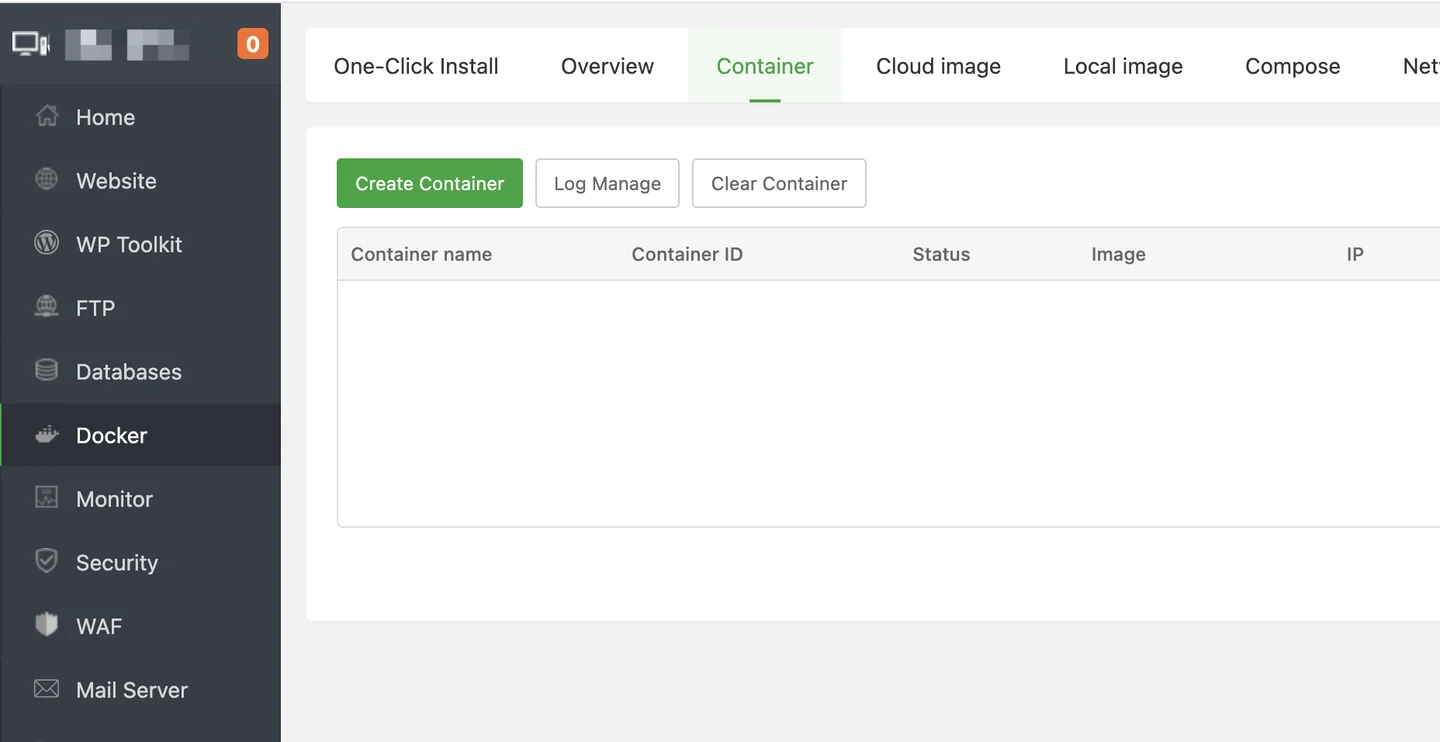
Once Docker is installed, search for AnQiCMS in the App Store.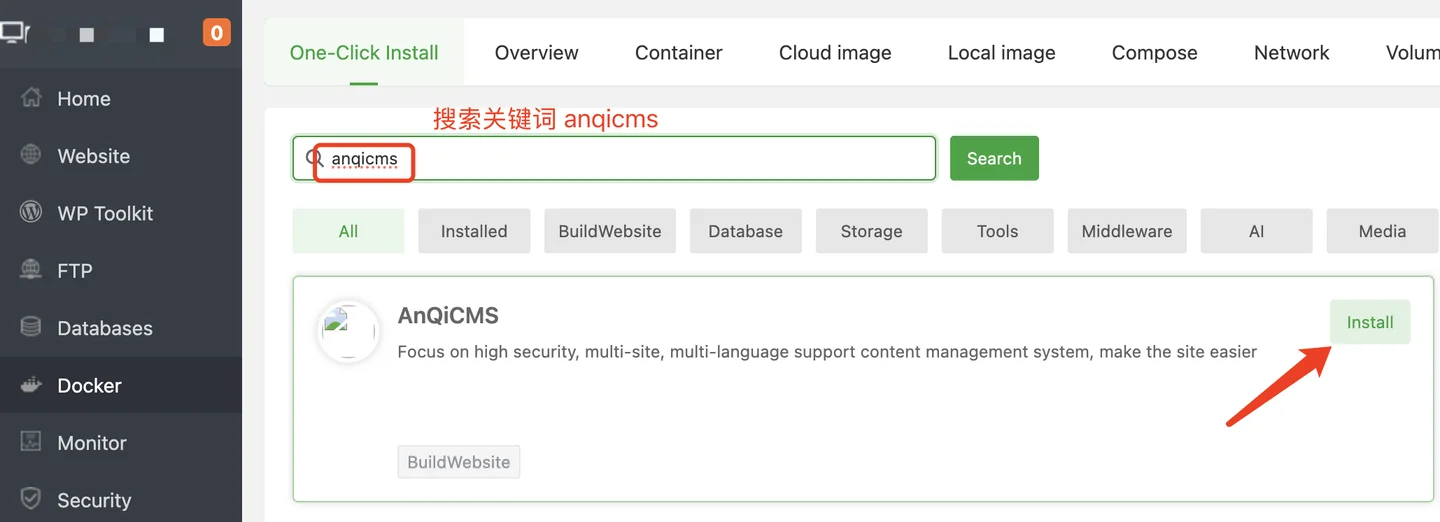
From the search results, click the Install button to enter the installation interface.
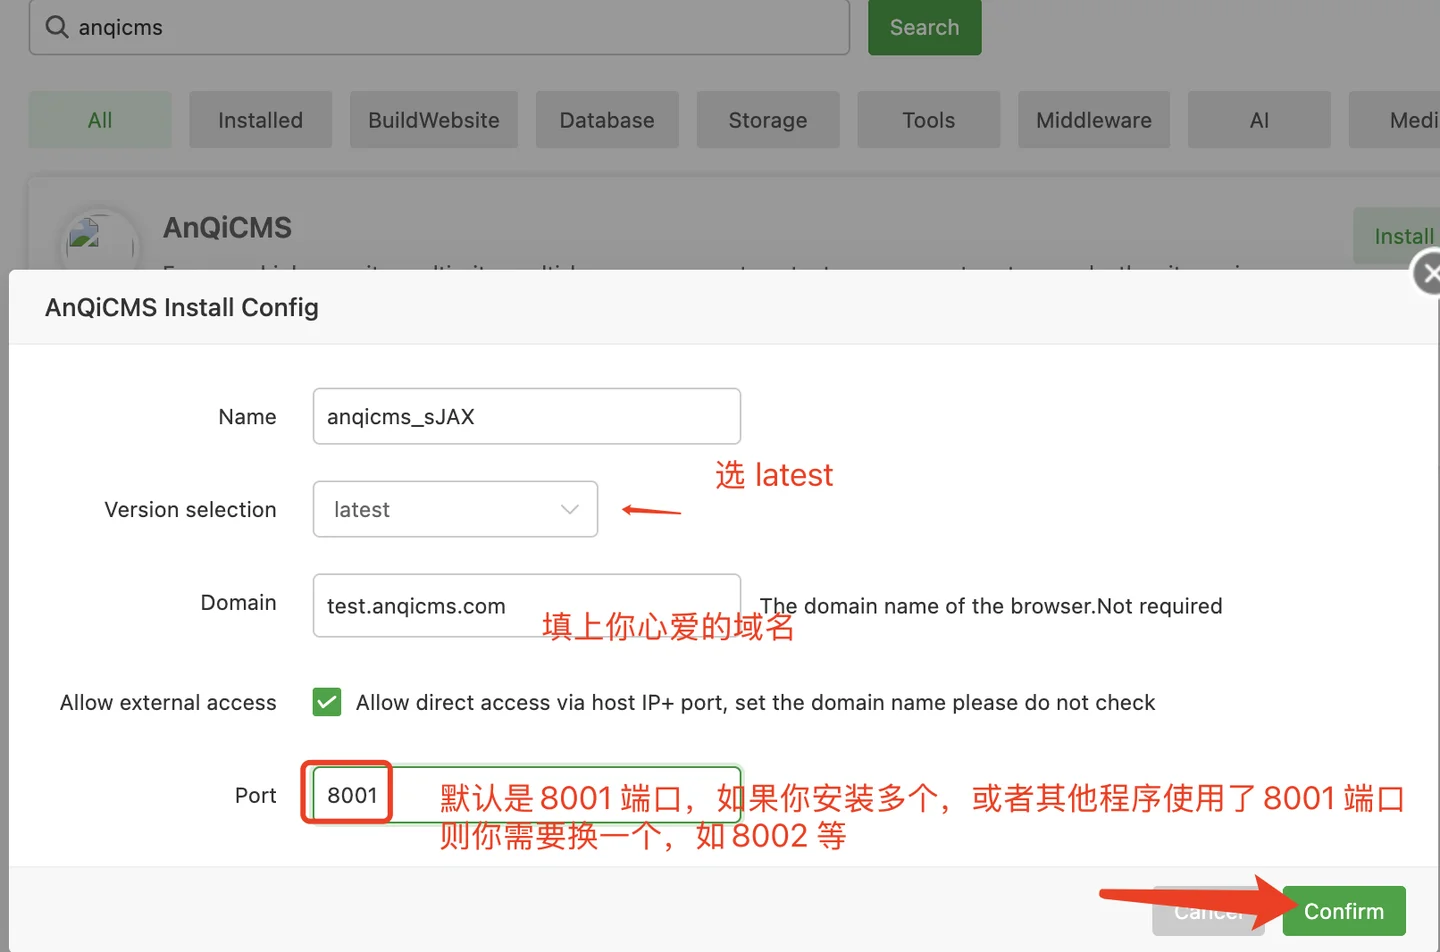
In the installation configuration, fill in the domain name in the Domain field and set the port to 8001, then click Confirm to start the installation.
After clicking confirm, the installation won't complete instantly. Please wait patiently for 1–5 minutes until it finishes.
If an error occurs, follow the error message instructions to resolve the issue. Then click the Restart button to retry.
Once the Docker installation is configured, the result should look like the image below:
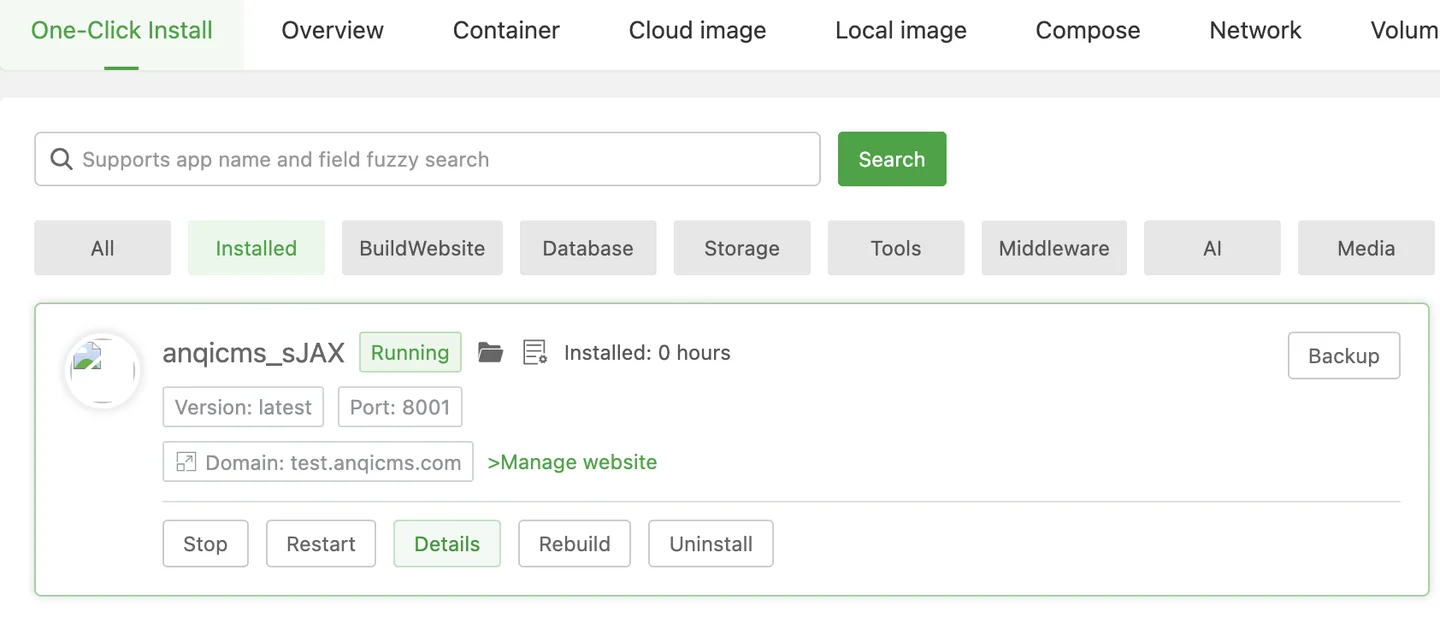
If the installation fails, you may need to manually configure a reverse proxy. Follow the instructions below to handle this:
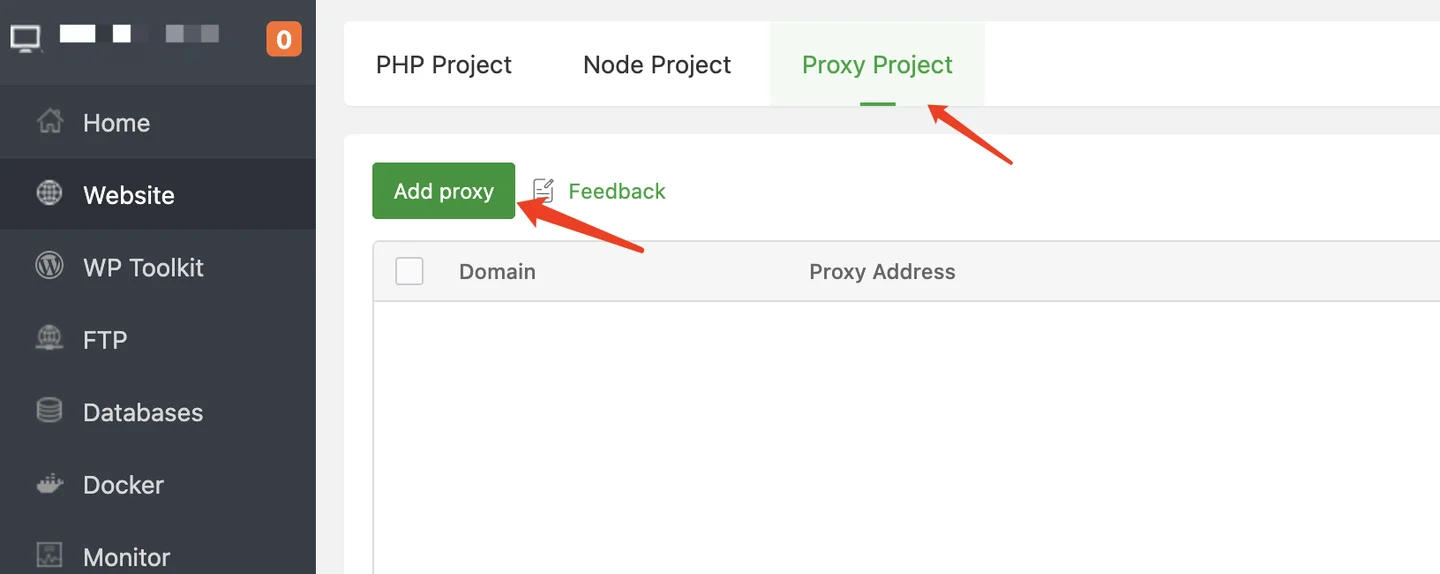
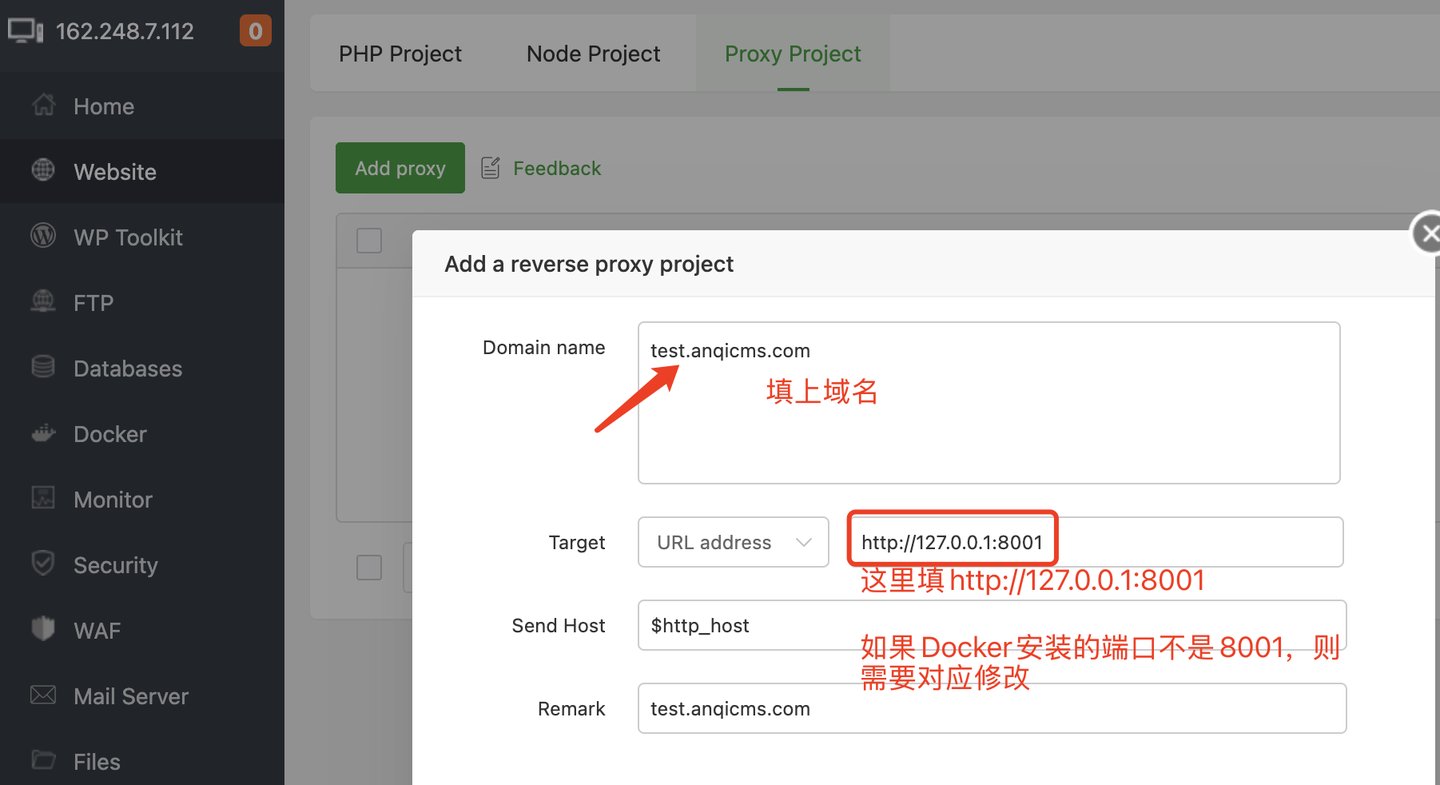
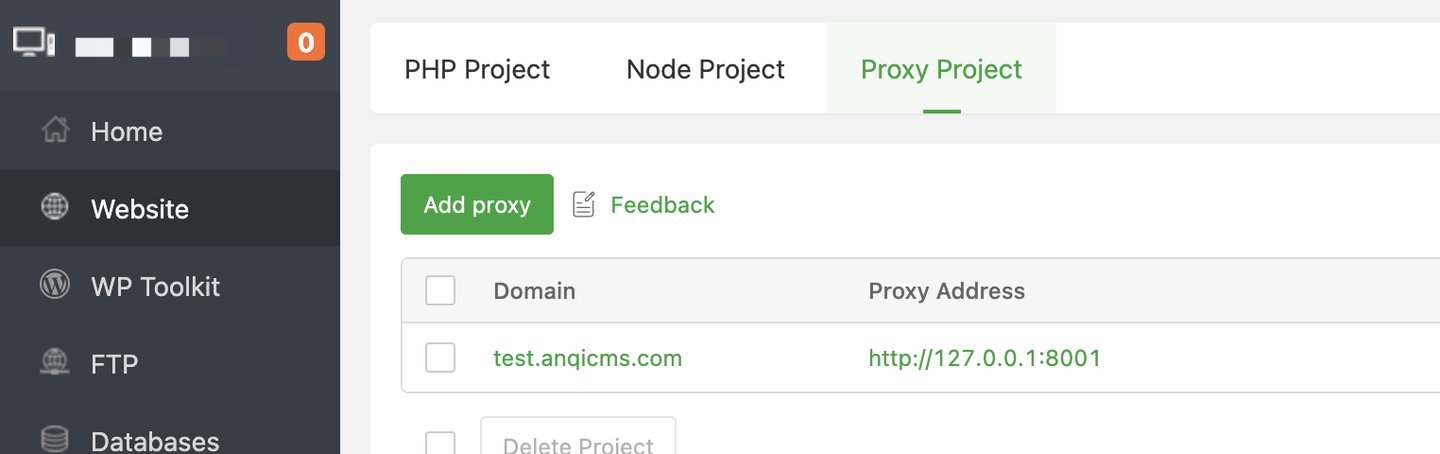
Getting Started with the Website
By default, the website is pre-installed, and default credentials are provided.Default Username: admin
Default Password: 123456
Admin Access URL: your-domain/system/
For example, if your website is http://test.anqicms.com/, the admin access URL is http://test.anqicms.com/system/.
Open your browser and visit the domain you entered earlier with /system/, e.g., http://test.anqicms.com/system/. Once on the website management interface, update the default username and password, and you’re ready to start using it.